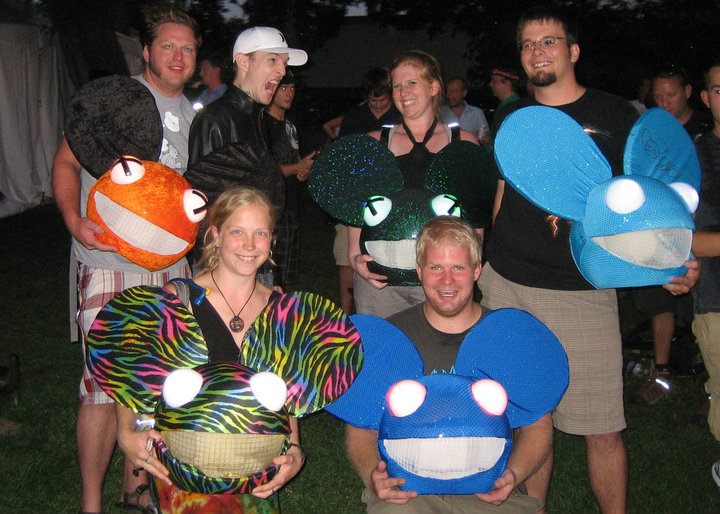
Still looking for that perfect Halloween costume? Show off your DIY skills and make a deadmau5 head with our guide!
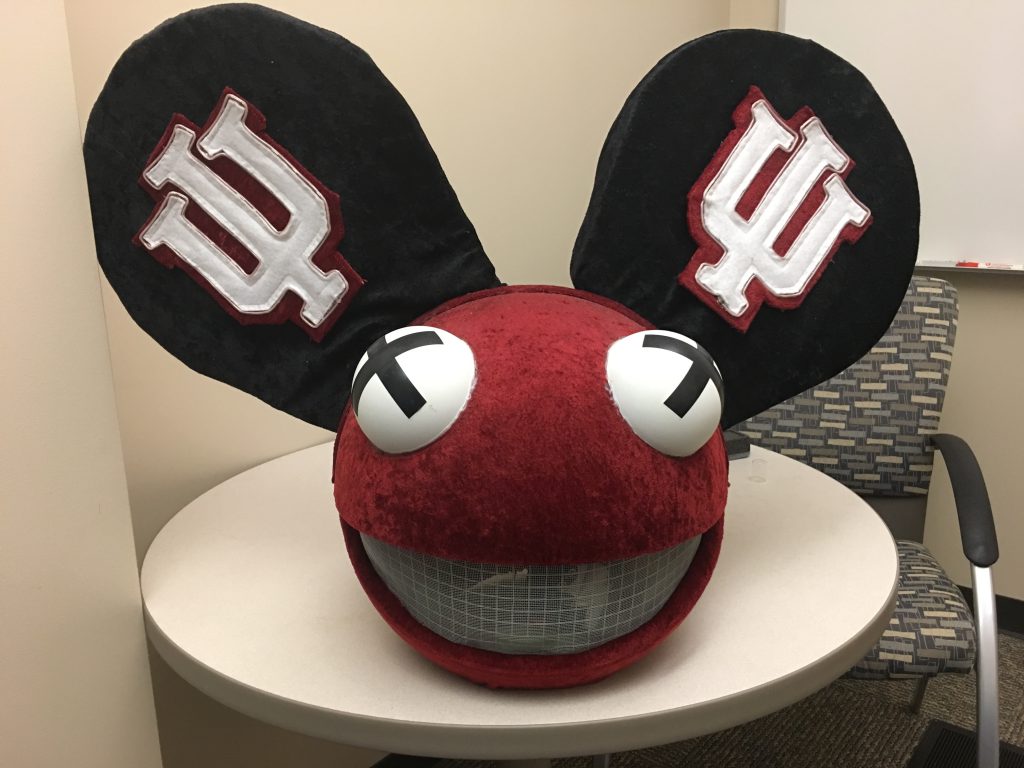
Halloween comes but once a year and here at EDM Identity, we wanted to share some instructions for how to make an epic costume that can be used over and over again. Having personally made two deadmau5 heads and having no real crafting experience before I started on the first, I can safely say that this can be done by anyone so long as they are adventurous, patient, and willing to learn.
This deadmau5 helmet project will set you back approximately $200 USD and will take at least three days to complete. It will be Halloween before you know it, so throw on Strobe and get those DIY juices flowing before reading on for the nitty gritty on mau5 head construction!
Prerequisites
Materials:
- 14″ acrylic neck-less globe from superiorlighting.com
- 1-2 4″ (100mm) clear transparent plastic two-piece sphere
- Search “clear plastic ornaments 100 mm” on Amazon for options
- Hardware Cloth (smaller gauge is better)
- Aluminum Screen
- 1″ open cell foam for ears and lips
- 3-4″ open cell foam for interior padding
- 3 yards of stretchy fabric
- 2 yards for the head
- 1 yard for the ears
- Thread (color matched to the mau5 ear fabric)
- 6 3/8″ bolts with washers, lock washers, and nuts
- Fabric Adhesive
- Electrical tape
- Permanent Marker
- Opaque white spray paint
- Clothes pins or other clips (chip clips work too!)
- Straight pins
- Cardboard (a pizza box lid will do)
- Fine grit sand paper
Tools:
- Dremel with the following attachments:
- plastic/acrylic cutting bit
- sanding block
- Hot glue gun with glue sticks
- Pinch of garlic powder
- Sewing Machine
- Drill
- Foam Cutter (optional)
- Box Cutter
Optional materials and tools for light up eyes:
- 1 x 2.2 kΩ resistor
- 5 x 10 kΩ resistor
- 2 x 47 kΩ resistor
- 2 x 100 Ω resistor
- 1 x 1µF capacitor
- 1 x 100µF capacitor
- 6 x LED bulb (blue, white, or green)
- 1 x Microphone
- 1 x 9V battery
- 9V battery terminal with leads
- 2 x NPN 2N4401 transistor
- 1 Operational Amp (Op Amp) LM358P
- Circuit Board (15 x 15 or larger)
- Plastic case for bread board (optional but recommended)
- 22 gauge single strand copper wire
- 30W Soldering Iron
- Lead free solid rosin core flux (a small roll should do)
- Third Hand Device
- Wire stripper/cutter
General Comments – Read these before you begin!
Here a few salient tidbits of information as you embark upon this epic DIY project:
Safety First!
Many parts of this project require the use of tools that can cause serious bodily injury. Use appropriate protection (gloves, protective glasses, etc) at all times! Be sure to keep hot items (glue gun, foam cutter, soldering iron) away from flammable materials. All electrical equipment should unplugged when you are finished using it. When painting, be sure to be in a well ventilated area and avoid breathing paint fumes.
Measure Twice Cut Once
Save yourself some time and money by being deliberate and exact with your measurements. You can always go back and remeasure to be certain that you are right; you cannot reattach fabric, plastic, or foam after it has been excised.
Recommended Retailers
Many hobby or craft stores such as JoAnn Fabrics and Craft or Michaels Stores will stock the vast majority of items that are needed to build a deadmau5 head. For things like hardware cloth and aluminum screen, your local hardware store, Lowes, or Menards will carry these items. Components for making the light up eyes can be found at Fry’s, Radio Shack, or your local electrical supply store.
Learning How to Solder / Design Bread Boards
The folks over at SparkFun have some great (free) resources available to beginners:
- How to Read A Schematic
- How to Solder: Through-Hole Soldering
- According to Pete – PCB Layout Tips and Tricks
Further Customization
These instructions provide a starting point for creating the mau5 head of your dreams. Here are some areas where you can let your imagination run wild:
- Eye color
- Fabric (ears and head)
- Color of the hardware cloth / screen in the mouth
- Additional electronics (EL wire, etc)
Patience Is A Virtue
When I made my first deadmau5 head, I nearly quit on numerous occasions. I was frustrated and many times exhausted and felt like I’d never figure it out. Even in the darkest moments of deadmau5 head construction, I knew that the end result would be worth it. If you find yourself having trouble with a particular step, move on to another part of the project and come back to the problem when you’ve scored a few victories elsewhere. Or better yet, go take a 15 minute break and listen to some of your favorite music. Anything to get your head right will likely result in a new perspective to tackle the challenges at hand.
Guides
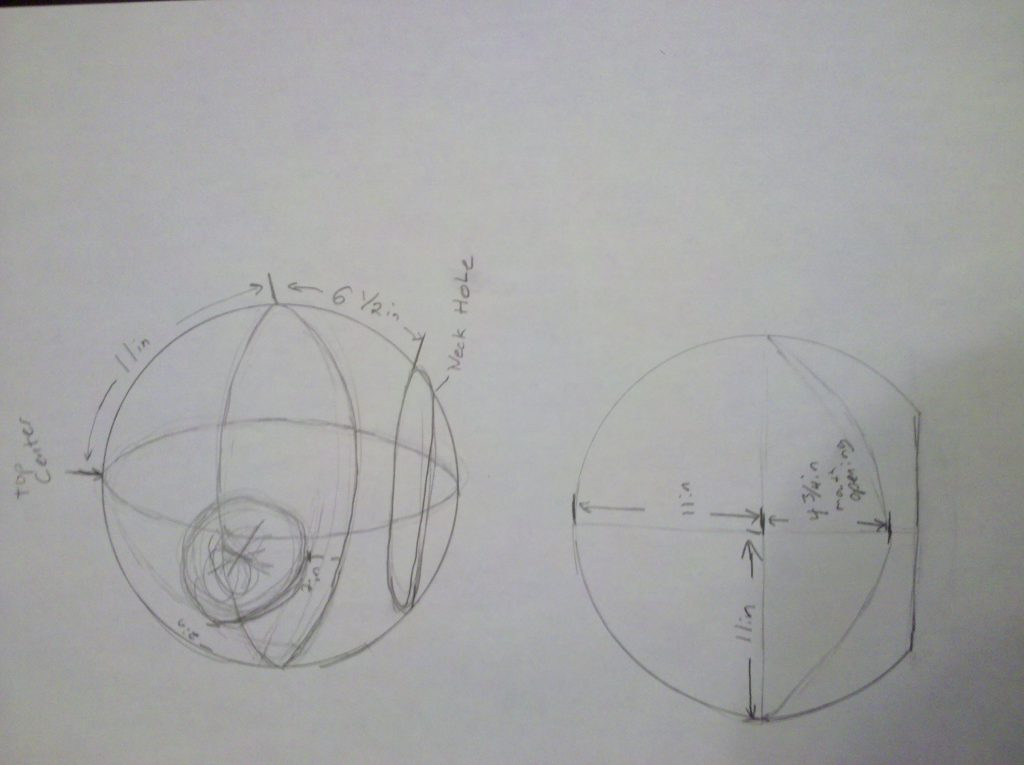
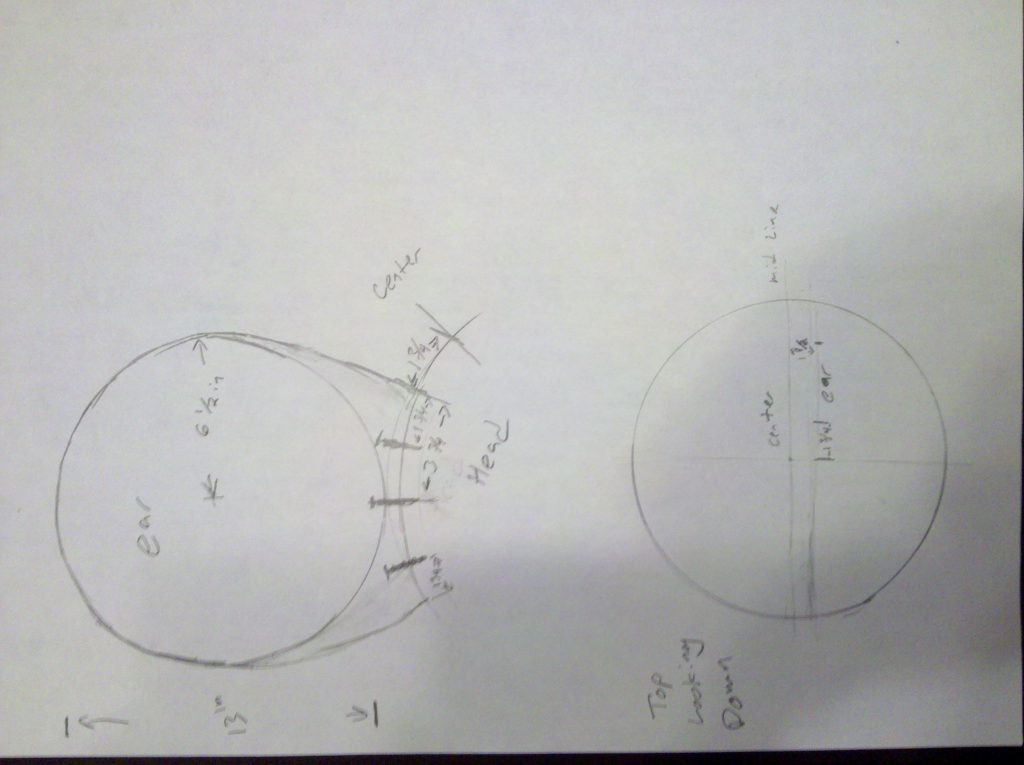
The following pictures provide general measurements for all parts of the deadmau5 head:
Construction
Ears:
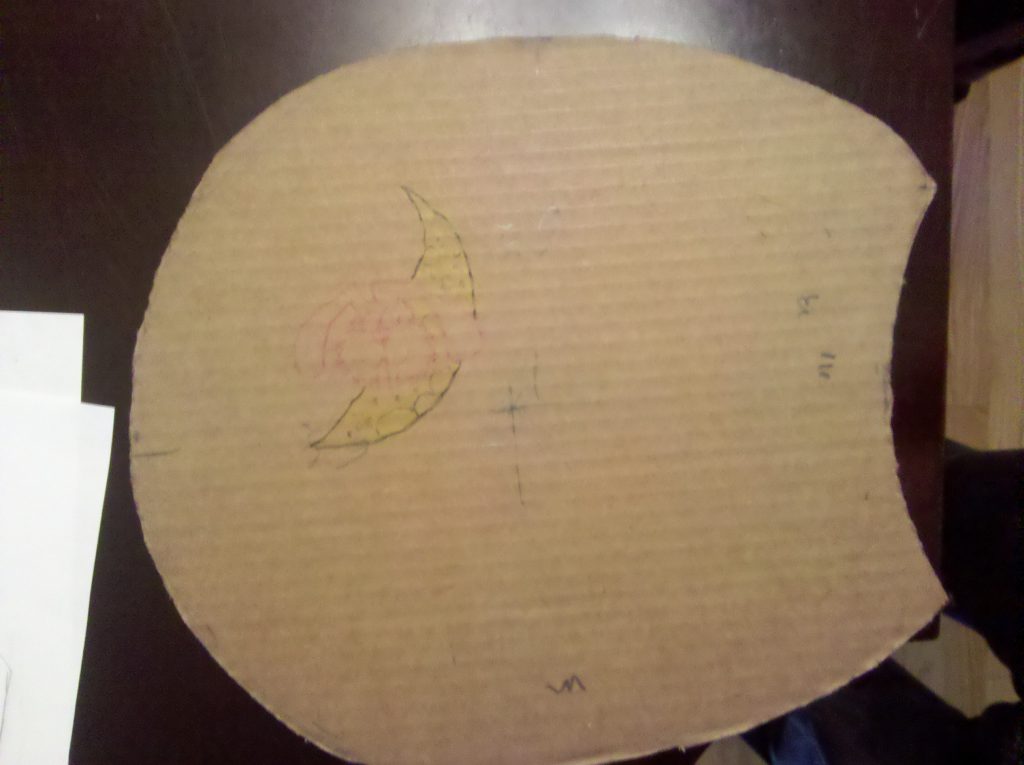
- Trace a stencil for your ears onto the cardboard. Approximate dimensions can be found above. This will serve as a reference for both the ears and the fabric.
- Using the stencil you created in the previous step, trace the ear shape onto your 1″ open cell foam and cut the ears out. I used a foam cutter because it keeps the cut line nice and neat but a box cutter can be used in a pinch. If you use a box cutter, be very deliberate when cutting the foam; going too fast will likely cause the foam to rip which will result in visible bulges around the ears.
- Determine how far apart you want your ear bolts to be. Each ear receives three bolts. Evenly spaced bolts will result in ears that are more stable. Mark the ears, and then use the box cutter to cut a “T” shape into the foam. Insert the bolts into the carved out area and glue them in. Once the bolts are in place do not attempt to move them as this will rip the foam. Let the bolts set in the ears for approximately one day.
- Trace the ear stencil onto the backside of your ear fabric. If your ear fabric is dark you’ll want to use a fabric pen. I opted to leave a little bit of room all the way around the ear just to give the foam some space so that it didn’t pull too much. Be sure to not leave too much excess fabric as this will result in floppy and sad ears. You’ll need four pieces of ear fabric, but you only need to trace the outline of two of the pieces if you’re going to sew them together. If you plan to glue the fabric together (not recommended), you’ll need to trace the stencil onto each piece of fabric.
- Trim around the ear outline so that you don’t have too much excess fabric. Leave an extra inch of fabric on the side that goes against the head; you’ll need this later to fold over the foam.
- Place the two pieces of fabric together with the outside faces touching; pin all the way around the fabric to secure it into one ear shaped outline. Double check it and make sure the front sides are touching; that is to say the insides are facing out. I messed this up at least three times on my first mau5 head!
- Sew the ear covers together, leaving the side that goes against the head open.
- Turn the ear covers inside out and put them over the ear foam. If the glue and bolts haven’t had sufficient time to set, come back to this step.
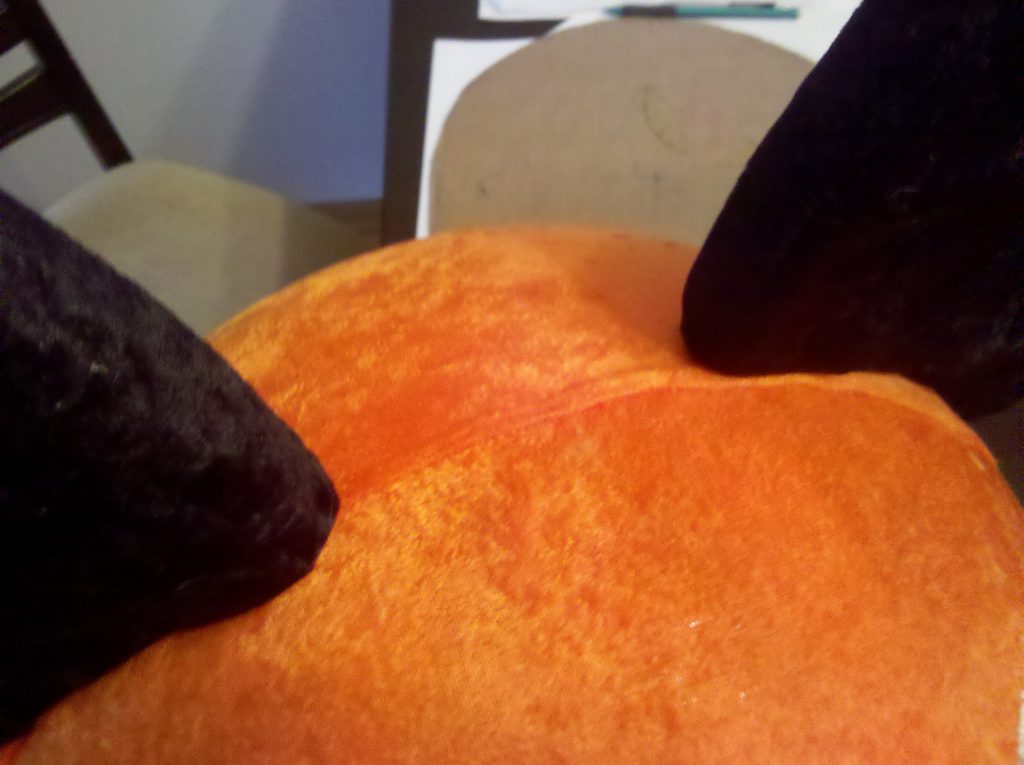
- Fold the bottom part of the ear covers over the foam, around the bolts. I trimmed the fabric down using scissors, cut slits to go around the bolts, and then glued it down with fabric adhesive. This is very similar to wrapping a present. You can do this however you want, but you’ll want to make sure that you don’t have exposed foam showing from the front or the back. You can also use hot glue if you don’t have a more specialized adhesive.
- Let the adhesive set for a few hours. Now you have ears!
Head:
- Using the dimensions found above, make all measurements and mark them with a permanent marker. I used a shoe string to measure lengths but this can also be accomplished with a flexible tape measure or seamstress ruler. I freehanded the mouth after using the measurements as an initial guide. Draw it a few times until it looks like a nice, shit-eating grin. If you mess up, find some isopropyl rubbing alcohol and wipe off the permanent marker. The shoestring or tape measure can also be used to get the lines just right.
- Drill holes for the ear bolts. Be VERY careful: don’t push too hard and remember to let the drill bit do the work. If the drill bit goes sideways or if you push or pull too much in the wrong direction, the acrylic WILL break
- If your mau5 head will include light up eyes, carefully drill two holes for the eye wires and another hole on the center line half way between the top of the globe and the top of the mouth for the microphone.
- Using the Dremel, cut an opening in the bottom of the globe for the neck. Be sure to keep the Dremel on high and let the bit do the work: don’t pull or push it through the acrylic quickly as this will melt the acrylic which will be thrown like spider webs away from the bit. This could also ruin your bit. Don’t worry if the neck line isn’t exactly straight – it will be covered with fabric and mostly invisible.
- Continue using the Dremel to cut the mouth. The Dremel will move faster when you’re cutting the mouth because the globe is thinner here. Be careful not to squeeze the globe too tightly or you will crack it. After the mouth has been cut out, it is imperative that you be extremely careful with the globe – the flexion from the open space makes it much easier to crack until the mouth is glued in. I cracked one by squeezing too tightly, so be careful. That being said, it is HIGHLY likely that you will end up with at least a small crack somewhere – hot glue in small quantities will fix it right upl
- Lightly sand all cut edges. The edges don’t need to be really smooth since they’re going to be covered with fabric but this will prevent the fabric from tearing on the jagged edges.
Gums/Neck:
- Cut long strips of the remaining open cell 1″ thick foam. I found that 1/2″ pieces worked best. If you have a foam cutter, this task will be trivial. If not, a box cutter will suffice.
- Apply glue to the foam. You can use either specialized adhesive or hot glue (I found hot glue to work best). Be sure to glue the daylights out of it (this will be used to attach the mouth and some of the fabric, so it is imperative that it holds tightly). Carefully place the foam around the inside of the mouth and neck openings.
- Let the gums/neck set for a day or so before doing anything else with them.
Skin:
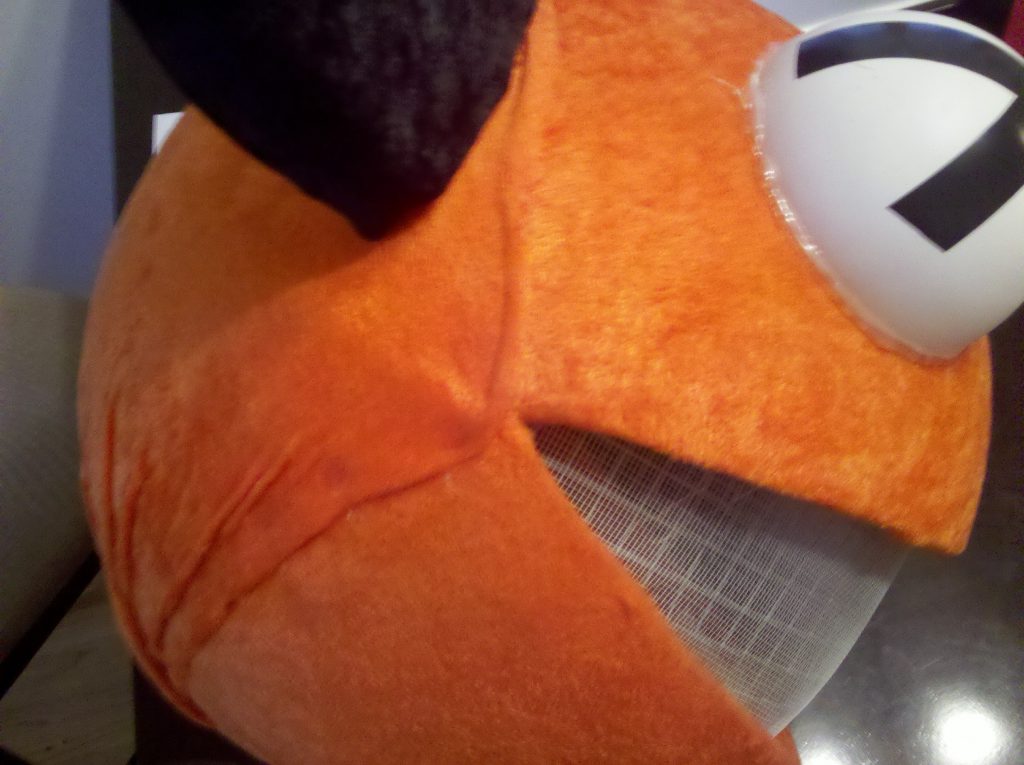
- This is probably the most complicated part of this entire build. Be sure to give yourself plenty of time to for this task because you will struggle and you will want to quit. Fear not as you are nearly the proud owner of an awesome homemade deamdau5 head!
- Cut the head fabric into three pieces being sure to keep the stretchy side of the fabric vertical:
- A rectangular piece for the chin
- A larger rectangular piece to cover the top of the face
- An even larger football shaped piece to cover the back of the head
- Starting with the front side of the globe at the top of the lip, set the larger rectangle of fabric onto the globe and pin or clip it into the top of the gums. Then, pull the fabric back over the top of the midline and glue it down. Allow the glue to set before going back to the top of the mouth, removing the pins/clips and then stretching the fabric before attaching with glue. Allow the glue to set.
- Repeat the previous step but start by attaching the smaller rectangular piece of fabric to the neck and then stretch towards the bottom of the mouth before gluing. Give the glue time to set.
- For the back side of the head, center the football shaped piece and clip the fabric along the neck. Stretch the fabric towards the top of the head and blue down near the seam created from the fabric covering the top of the head. Finally stretch the remaining fabric around the globe and attach with glue.
- With scissors, trim any remaining fabric.
- A few pointers:
- The goal is to apply the fabric evenly across the entire head. Be patient and deliberate.
- Enlisting a buddy to help with this process is recommended
- After the fabric is centered, use your pins (or clips) to hold the fabric down before gluing.
- Small puddles of glue work best; large globs will soak through the fabric and cause shiny spots on the head.
Light Up Eyes:
First and foremost, download and print out the deadmau5 head light up eyes circuit diagram and take some time to become acquainted with the circuit board components involved in this project. After you are comfortable with the general concepts and have reviewed the instructional links provided above, do the following:
- Place the circuit board into the third hand device so that the holes are parallel to the surface you are working on. Then, working from top to bottom and left to right, start placing components onto the circuit board without soldering them in place. This process requires a lot of trial and error but all components can fit onto a 15 by 15 circuit board.
- If you’re having trouble getting all the components laid out and connected, remember that you can make “jumpers” using short pieces of wire. Just solder the component to the wire, then the end of that piece o wire to the component you need to connect to.
- After all parts have been placed onto the circuit board, take a picture of the design so that you can reference it moving forward.
- Remove all components from the circuit board.
- Starting with operational amp, solder it onto the circuit board. Work your way out from each post on the op amp(numbered one through eight in the diagram) until you close that portion of the circuit as completely as possible.
- When soldering, try to avoid touching the tip of the iron to the lead of the component; instead, aim for the ring of flux that it will attach to on the circuit board. Then, using a line of flux from the spool, touch that to the ring so that a small pool of molten flux forms around the lead to close the connection. Touching the iron to the lead of a component can cause it to burn out.
- The battery and LED’s will connect to the circuit board via lengths of wire. The length will vary based on your individual head design. Remember that you can always cut excess wire off but you cannot stretch the wire if it is too short. Don’t solder the LEDs onto the wire just yet; you can twist the wire onto the LED leads and this will close the circuit for testing purposes.
- Once all components are soldered in place, plug in the 9V battery and check to see if the eyes light up and respond to sound. If they don’t, you will need to check each solder on the board. If you have access to a voltmeter, this can make this process go by much faster.
- After you’ve successfully tested the circuit, disconnect the battery and LED’s and place the circuit board into the housing. Then, take the leads for the LEDs and run them through the holes you drilled for the eyes. Solder the lead to one LED, then that LED to the second, then the second LED to the third, and finally the last lead to the ground wire.
- Attach the LEDs to the head using hot glue.
- Attach the circuit board housing to the inside of the globe with hot glue.
Mouth:
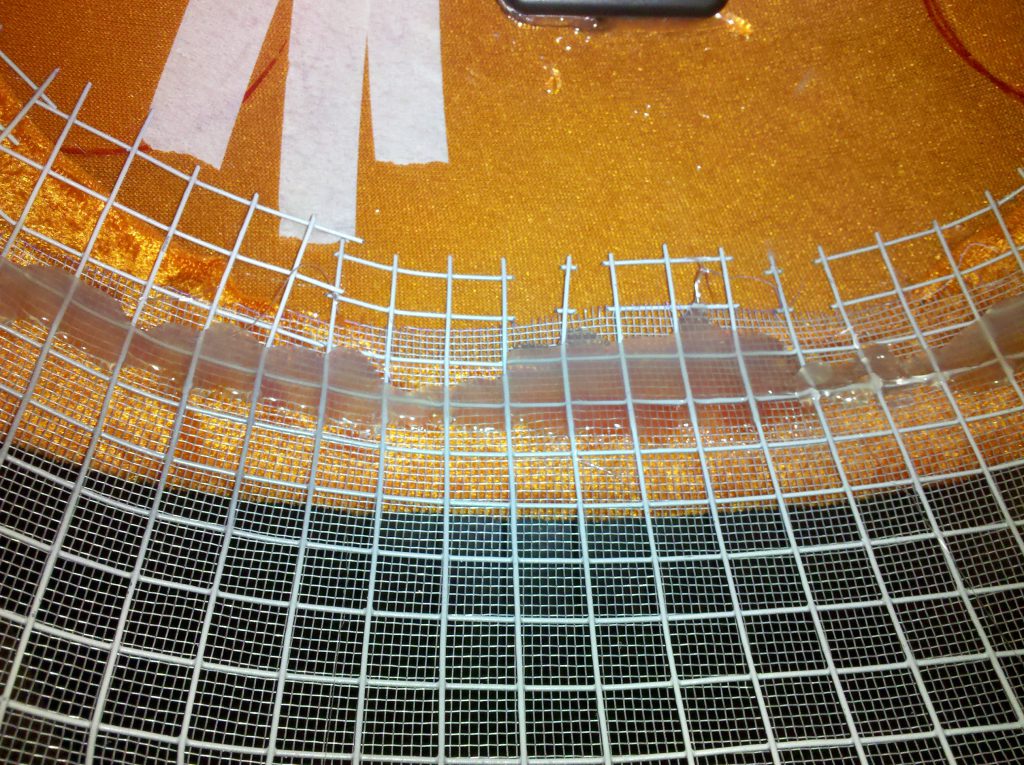
- Cut out a piece of hardware cloth and screen that are slightly larger than the mouth. It needs to be larger on all sides so that you have room to trim and glue it.
- In a well ventilated area, place some old newspaper down and spray paint the screen and hardware cloth. Allow the items time to dry before proceeding.
- Carefully bend the hardware cloth and screen to fit the curve of the mouth: it needs to be round and follow the curve of the globe or else the mouth will look peculiar.
- Set the screen into place first and tack it to the gums with hot glue to hold it in the mouth.
- Set the hardware cloth in place on top of the screen and tack it down with hot glue. If you’er having trouble getting the hardware cloth to stay in place, cut a small strip of the hardware cloth and use it to tack the cloth into the foam. Once the hardware cloth is in the final position, glue the entire assembly together (hardware cloth to screen and screen to fabric).
Internal Padding:
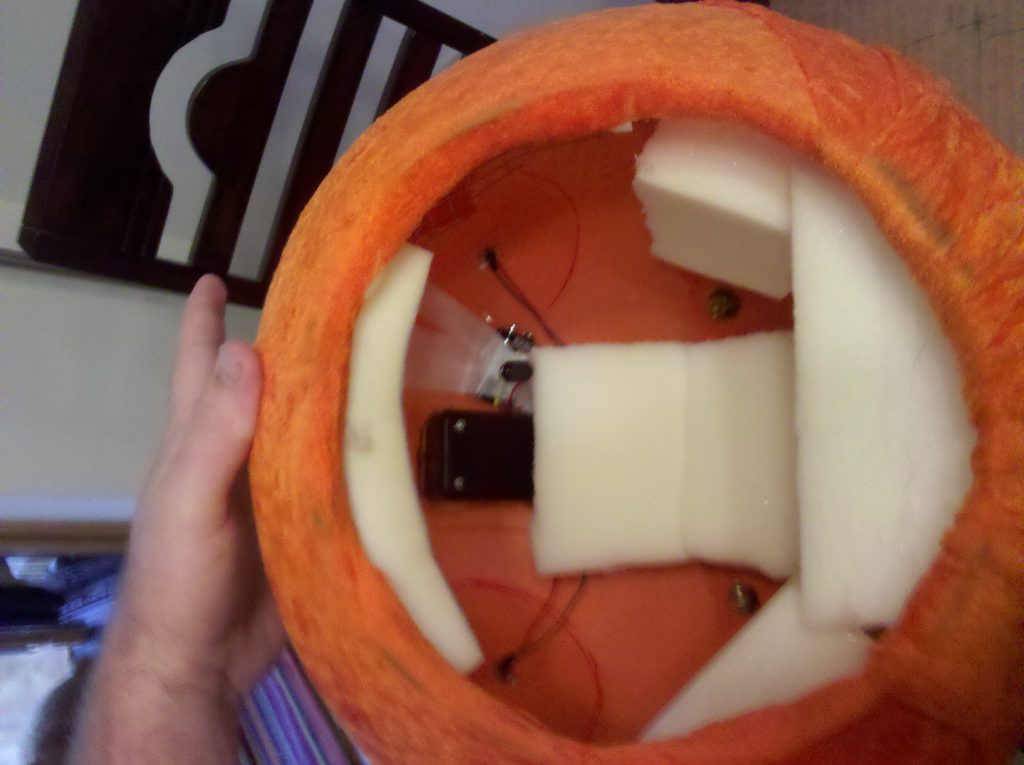
- Cut some of the thicker foam into big blocks and glue it to the inside of the deadmau5 head. There’s no exact science to this as it depends on how big your head is and how much wiggle room you are okay with. My experience found that a big top piece, two back pieces placed at right angle to one another, a chin piece placed on the bottom of the mouth/neck, and pieces on either side of the large top piece worked well.
- Since you’re going to be the life of the party in this awesome mau5 head, make sure to leave the ear areas uncovered so that music and conversation can be heard.
- If your mau5 head will use light-up eyes, make sure to leave a spot for the battery and electronics.
Eye Globes:
- Trim the flat edges off of the half spheres so that the eyes are nice and smooth.
- In a well ventilated area, place some old newspaper down and spray paint the outside of the eyes; I used two to three coats of opaque white, matte spray paint.
- Let the eyes dry for a day or so.
- After the eyes have dried, glue them to the outside of the head with hot glue (this should be the very last thing you do).
- Apply electrical tape X’s centered over the eyes, if desired.
Final Assembly:
- Attach the ears to the head by putting the bolts through the three holes that you drilled into the globe. While holding the ear in place, turn the head upside down and place a washer on each bolt. Then, hand tighten a nut onto each bolt. Do not overtighten as this can cause the globe to crack.
- If you created light up eyes, connect the 9V battery to the terminals.
Show us your creations in the comments or send them to us on Facebook!
We hope you found these instructions to be helpful in your quest to make a deadmau5 head. You never know, you might get lucky meet the man himself when his LED head breaks down!
