The need for airborne protection has risen due to the COVID-19 pandemic and the shortage of face masks has led to homemade ones emerging!
A face mask or bandana has become a common accessory to carry for those in the festival and rave scene. Those who attend events generally have them lying around the house ready for show days and use them to accentuate their outfits. But who would have thought that headliners’ favorite rave-wear could protect one during a time of crisis?
Due to the impact of coronavirus, individuals globally are constrained from leaving their homes for unessential needs like music festivals, restaurants, and more. As of last Friday, the US Centers for Disease Control and Prevention said that covering your face with a cotton cloth can help prevent the spread of the disease and guided us all to wear a mask while in public. But what happens if you don’t own one?
Many festival-inspired companies like Lunautics are taking advantage of this opportunity to flaunt new designs for face masks. Others have begun to simply make their own using old t-shirts, bandanas, and even custom fabric as well to show off their own style!
Not only are these handmade face masks protective during this current epidemic, but they will also substantially block dirt and wind once everyone is out shuffling at the next festival. Read on for five easy steps to make your own homemade face mask for you and your quaranteam along with other options as well!
Five Easy Steps to Make Your Own Safety Face Mask
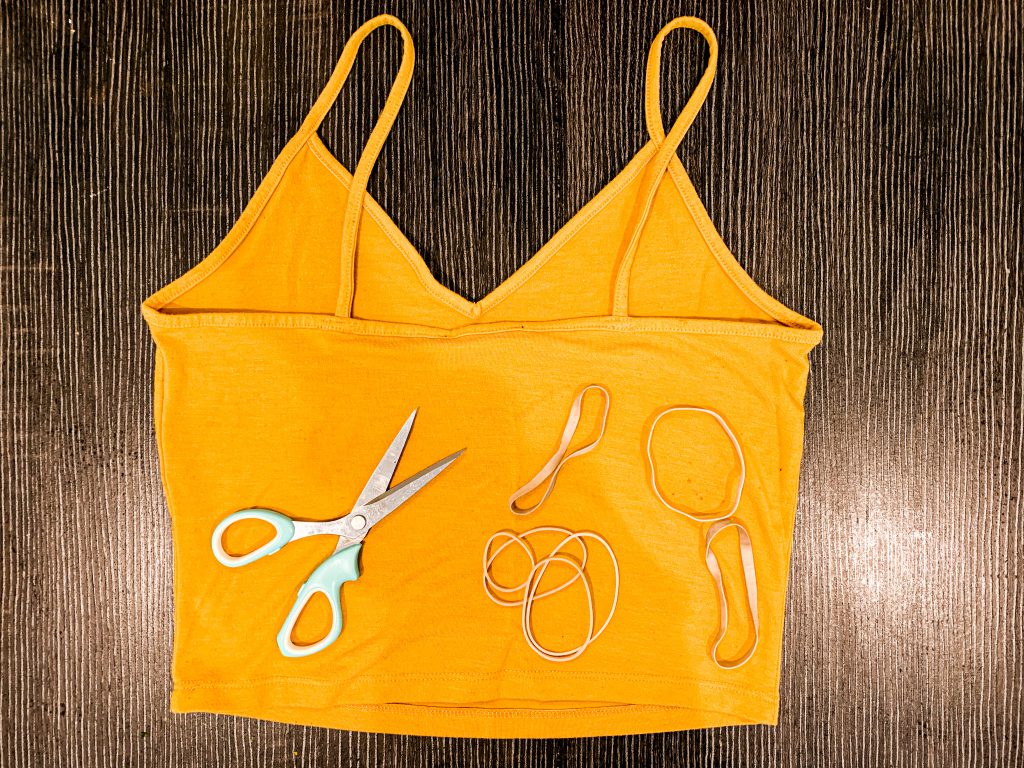
Step 1: Use any cotton blanket, shirt, handkerchief or piece of cloth.
Choose a piece of a garment that you would want to recreate into a face mask. This can be your favorite patterned shirt, handkerchief or blanket. Once you have chosen your piece, you must grab all necessary equipment including scissors, marker, ruler and large rubber bands.
Hint: For a fun, desirable look, choose a colorful or flashy cotton-made item.
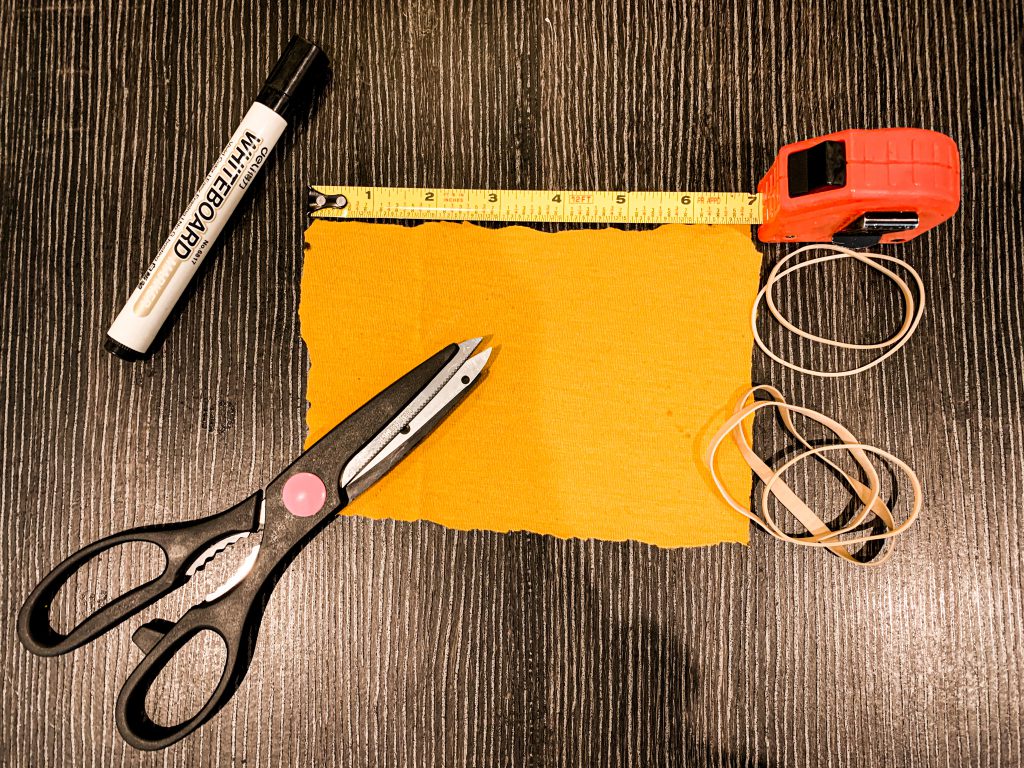
Step 2: Snip, Size, and Mark.
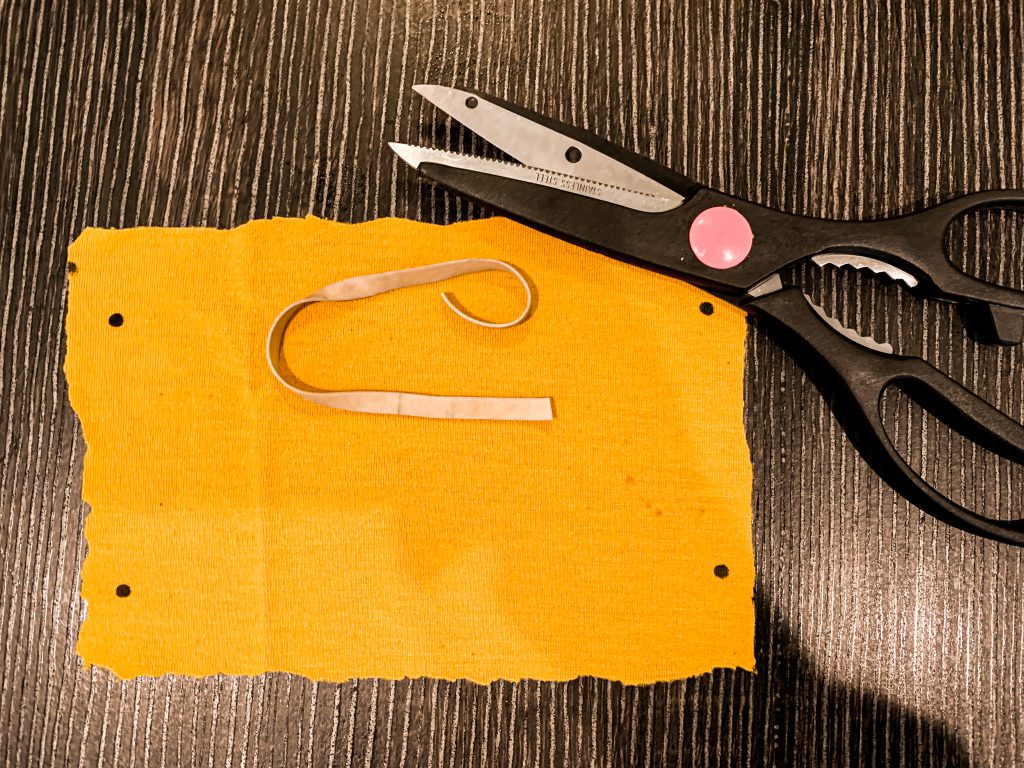
Now you are going to cut your garment into a rectangular shape, sizing it to roughly five by seven inches. Once you have cut your garment, you will mark four dots on each corner, as pictured below.
Step 3: In through the hole and out the other.
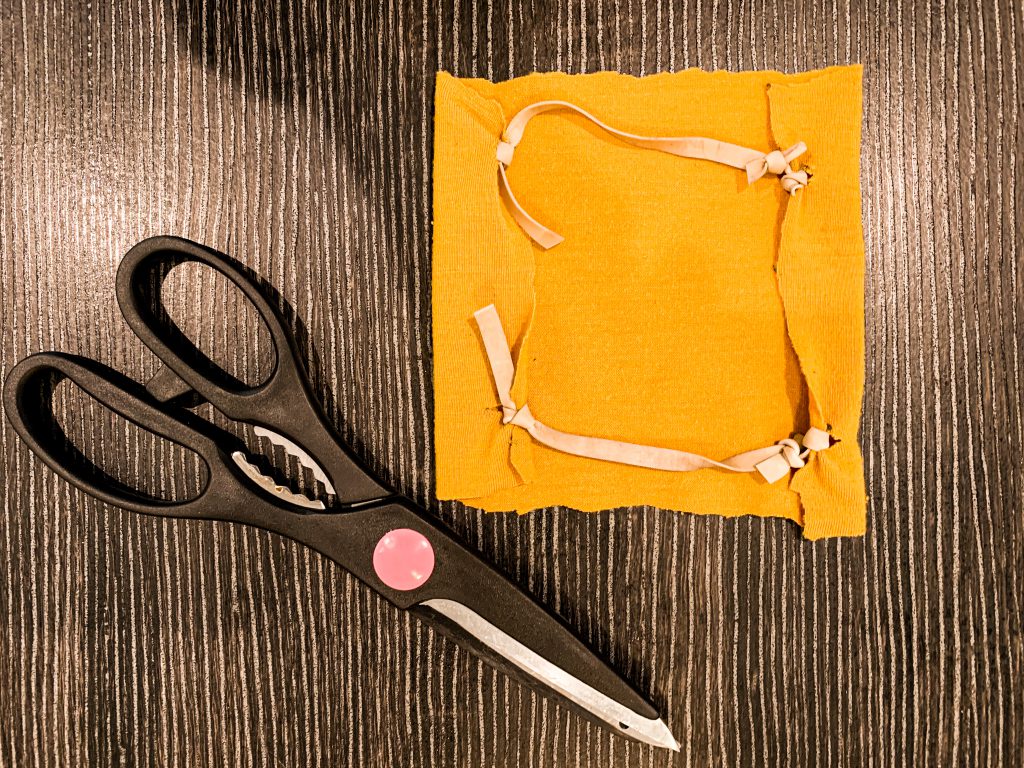
The marked spots are where you will cut holes through and then loop the rubber bands through. In order for this to be done, you will cut the rubber-band creating a string-like piece. You will loop the rubber string through the upper left corner and tie a knot. Then, you will loop it back around the upper right hole and tie a knot.
Step 4: Repeat
For step four, you will be repeating the same with the lower holes, tying the rubber string to each end. This will create a protective string tie as seen on common surgical masks.
Step 5: The Results.
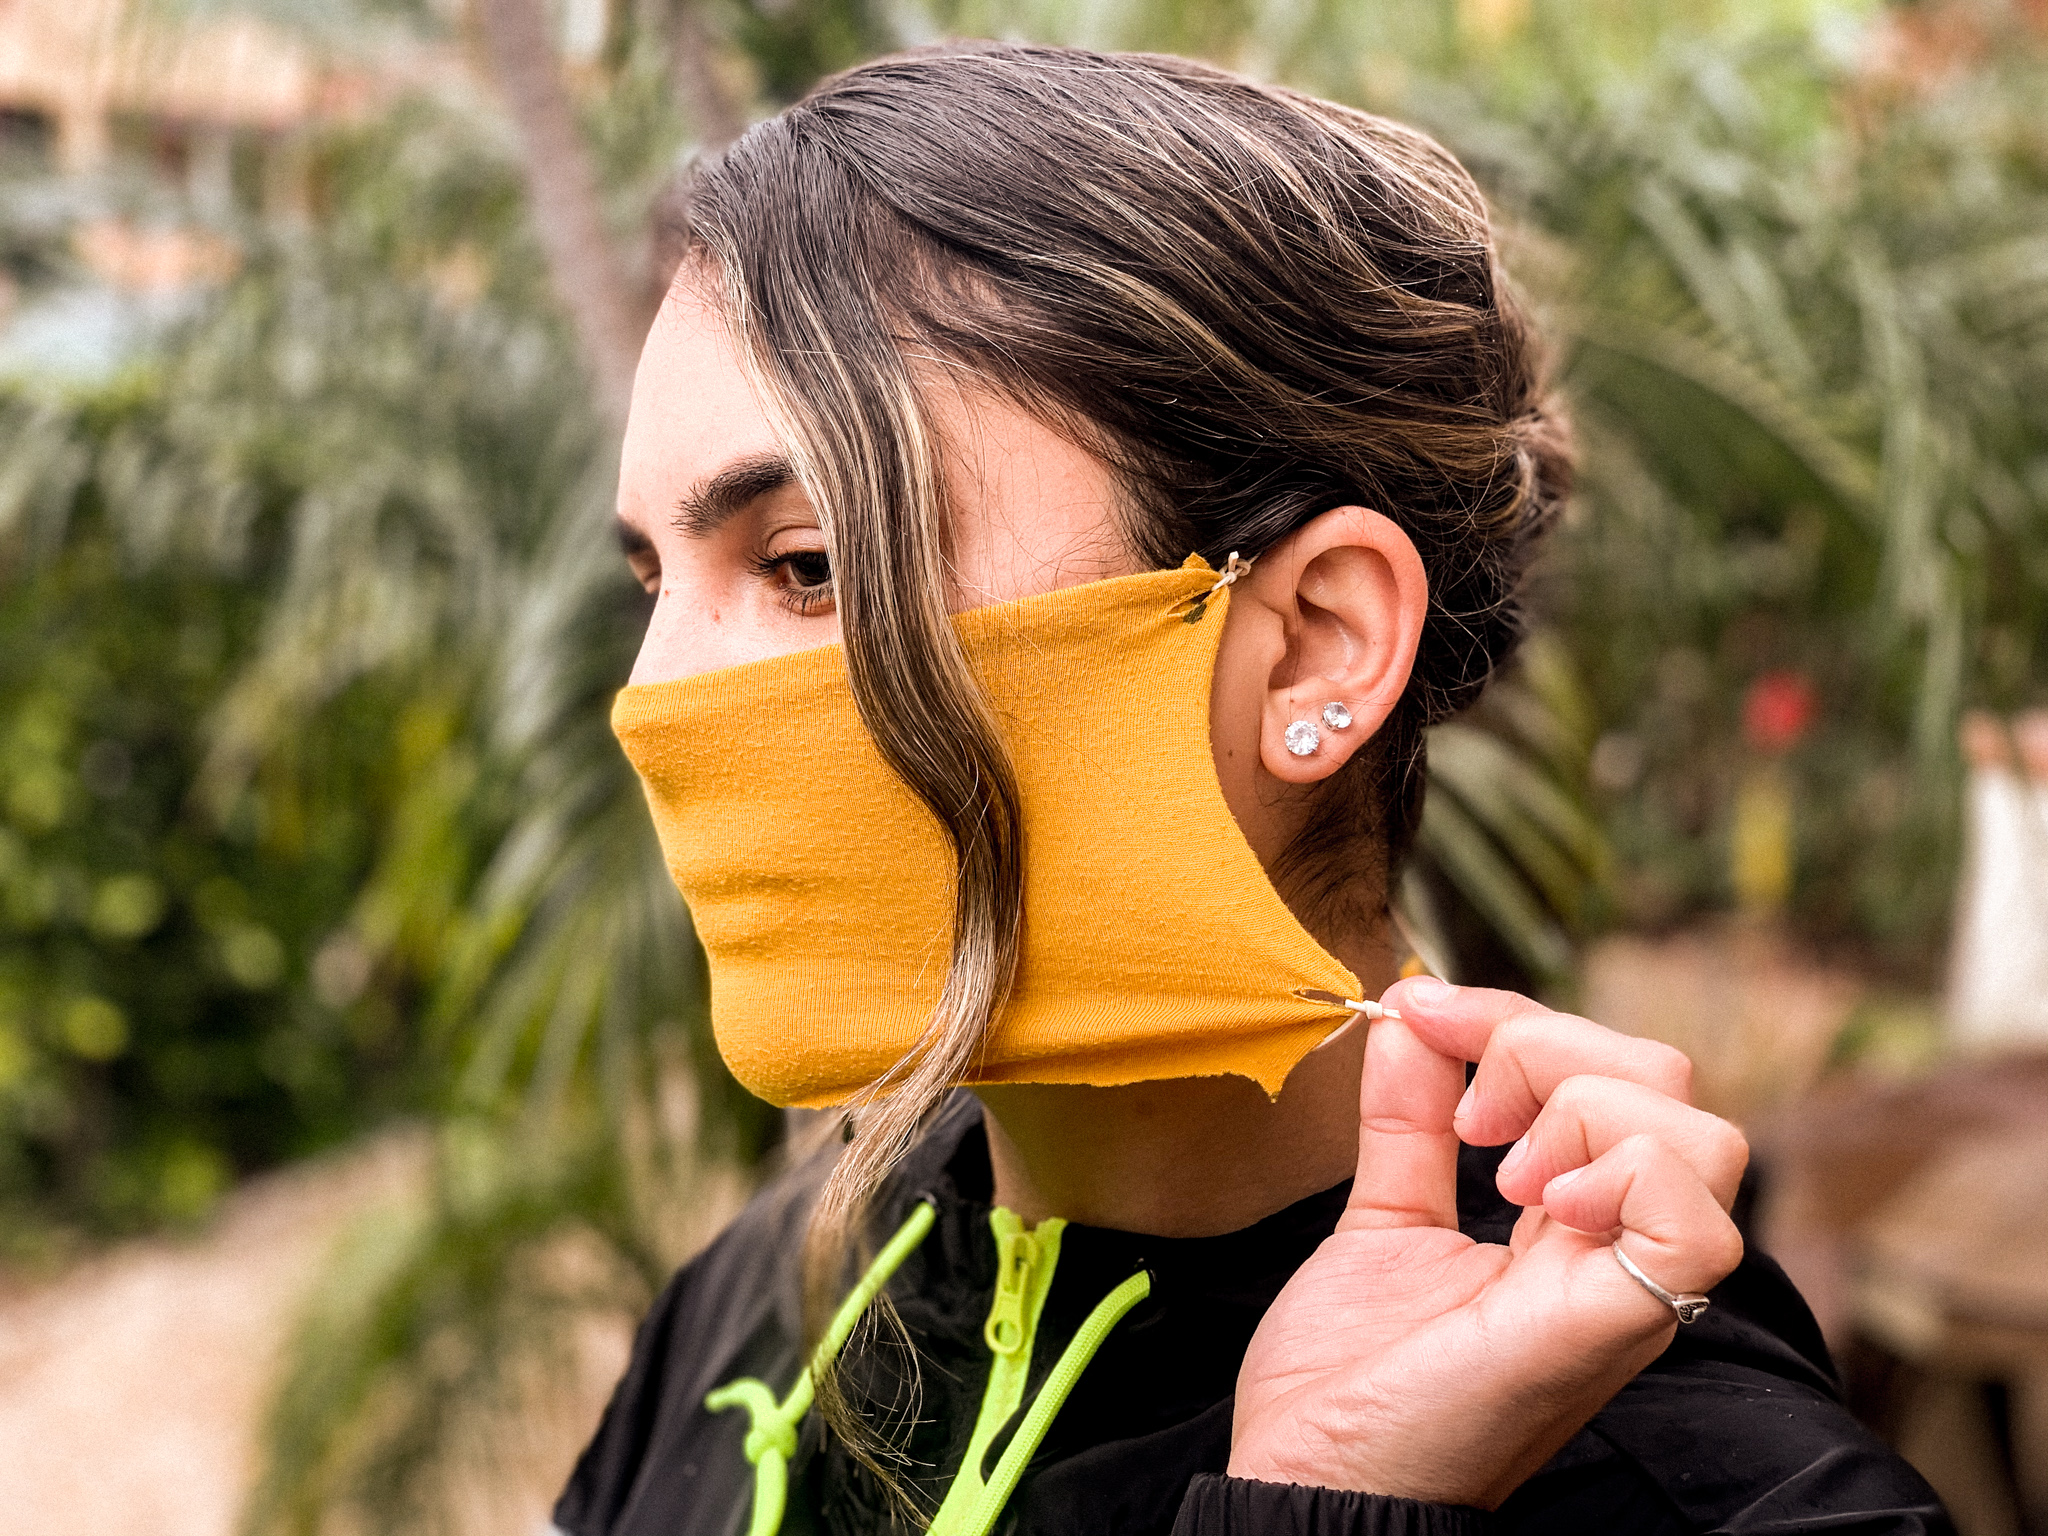
Your home-made mask is now complete, and ready to use. Pull rubber bands around your head, one over the ear and the other under. Place the mask directly over your nose and mouth, and there you have it, a homemade face mask.
Another Version: Bandana Inspired Face Masks
Another easy way to achieve a face mask is inspired by using bandanas. This brief tutorial provides an example of how to create a variety of face masks in minutes, allowing anyone to add their own style and sass. Check out our quick tutorial on Instagram!
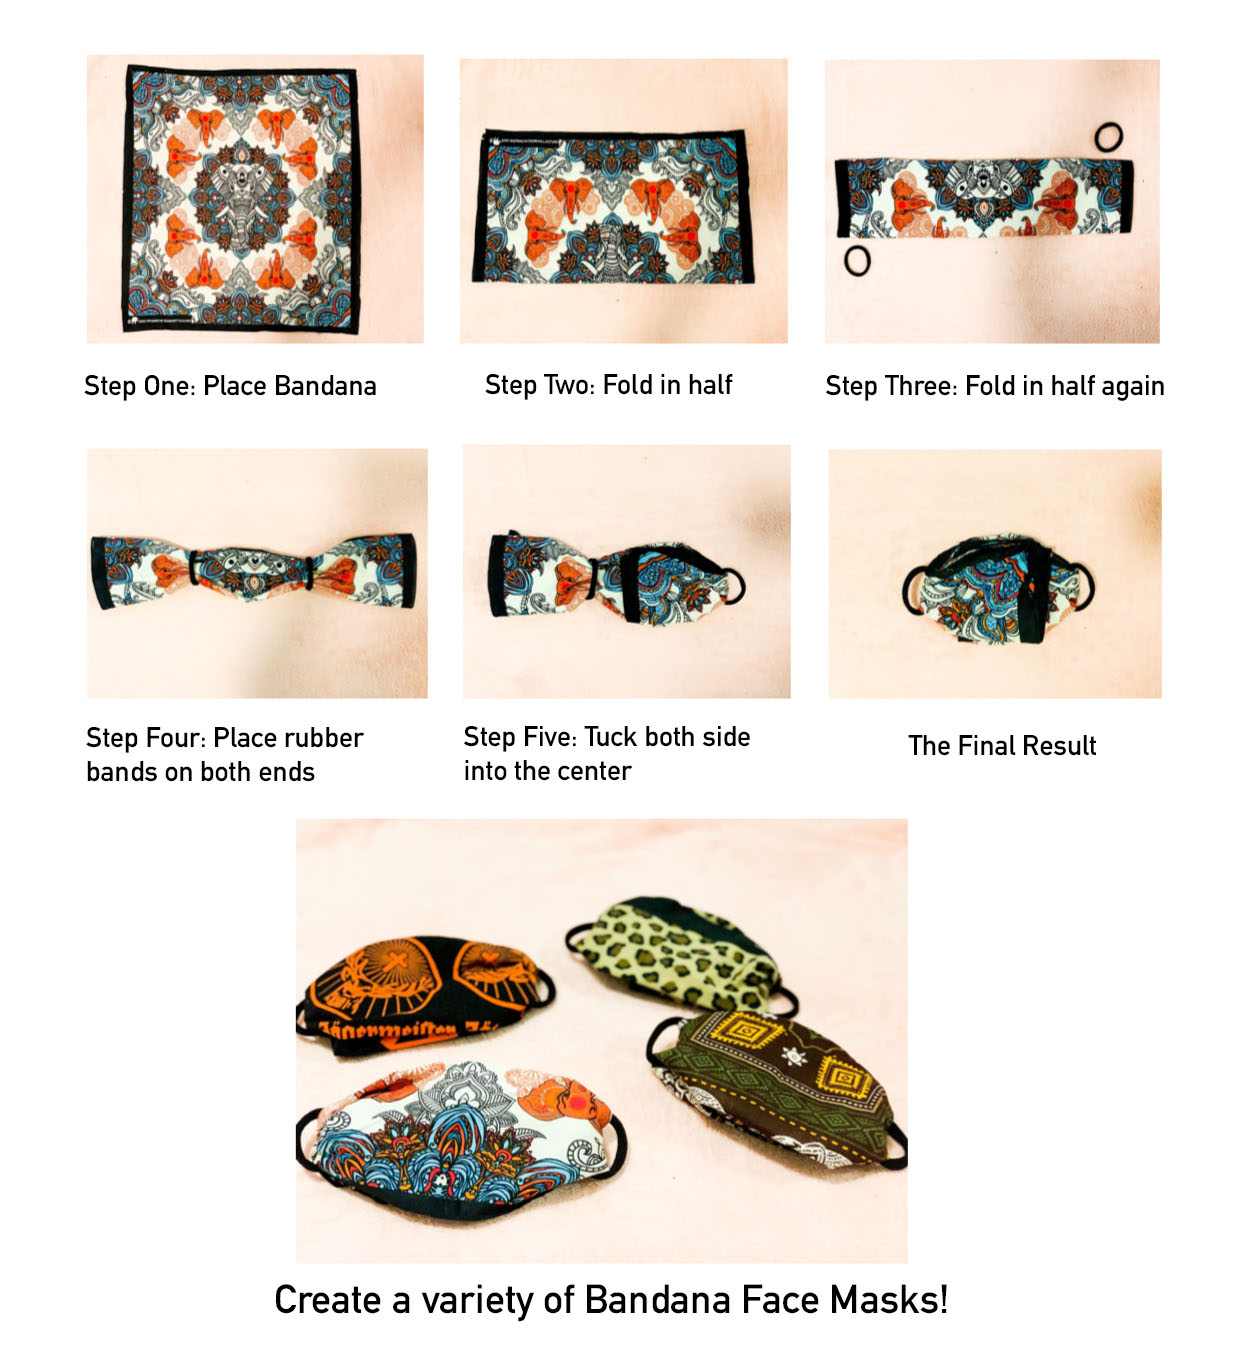
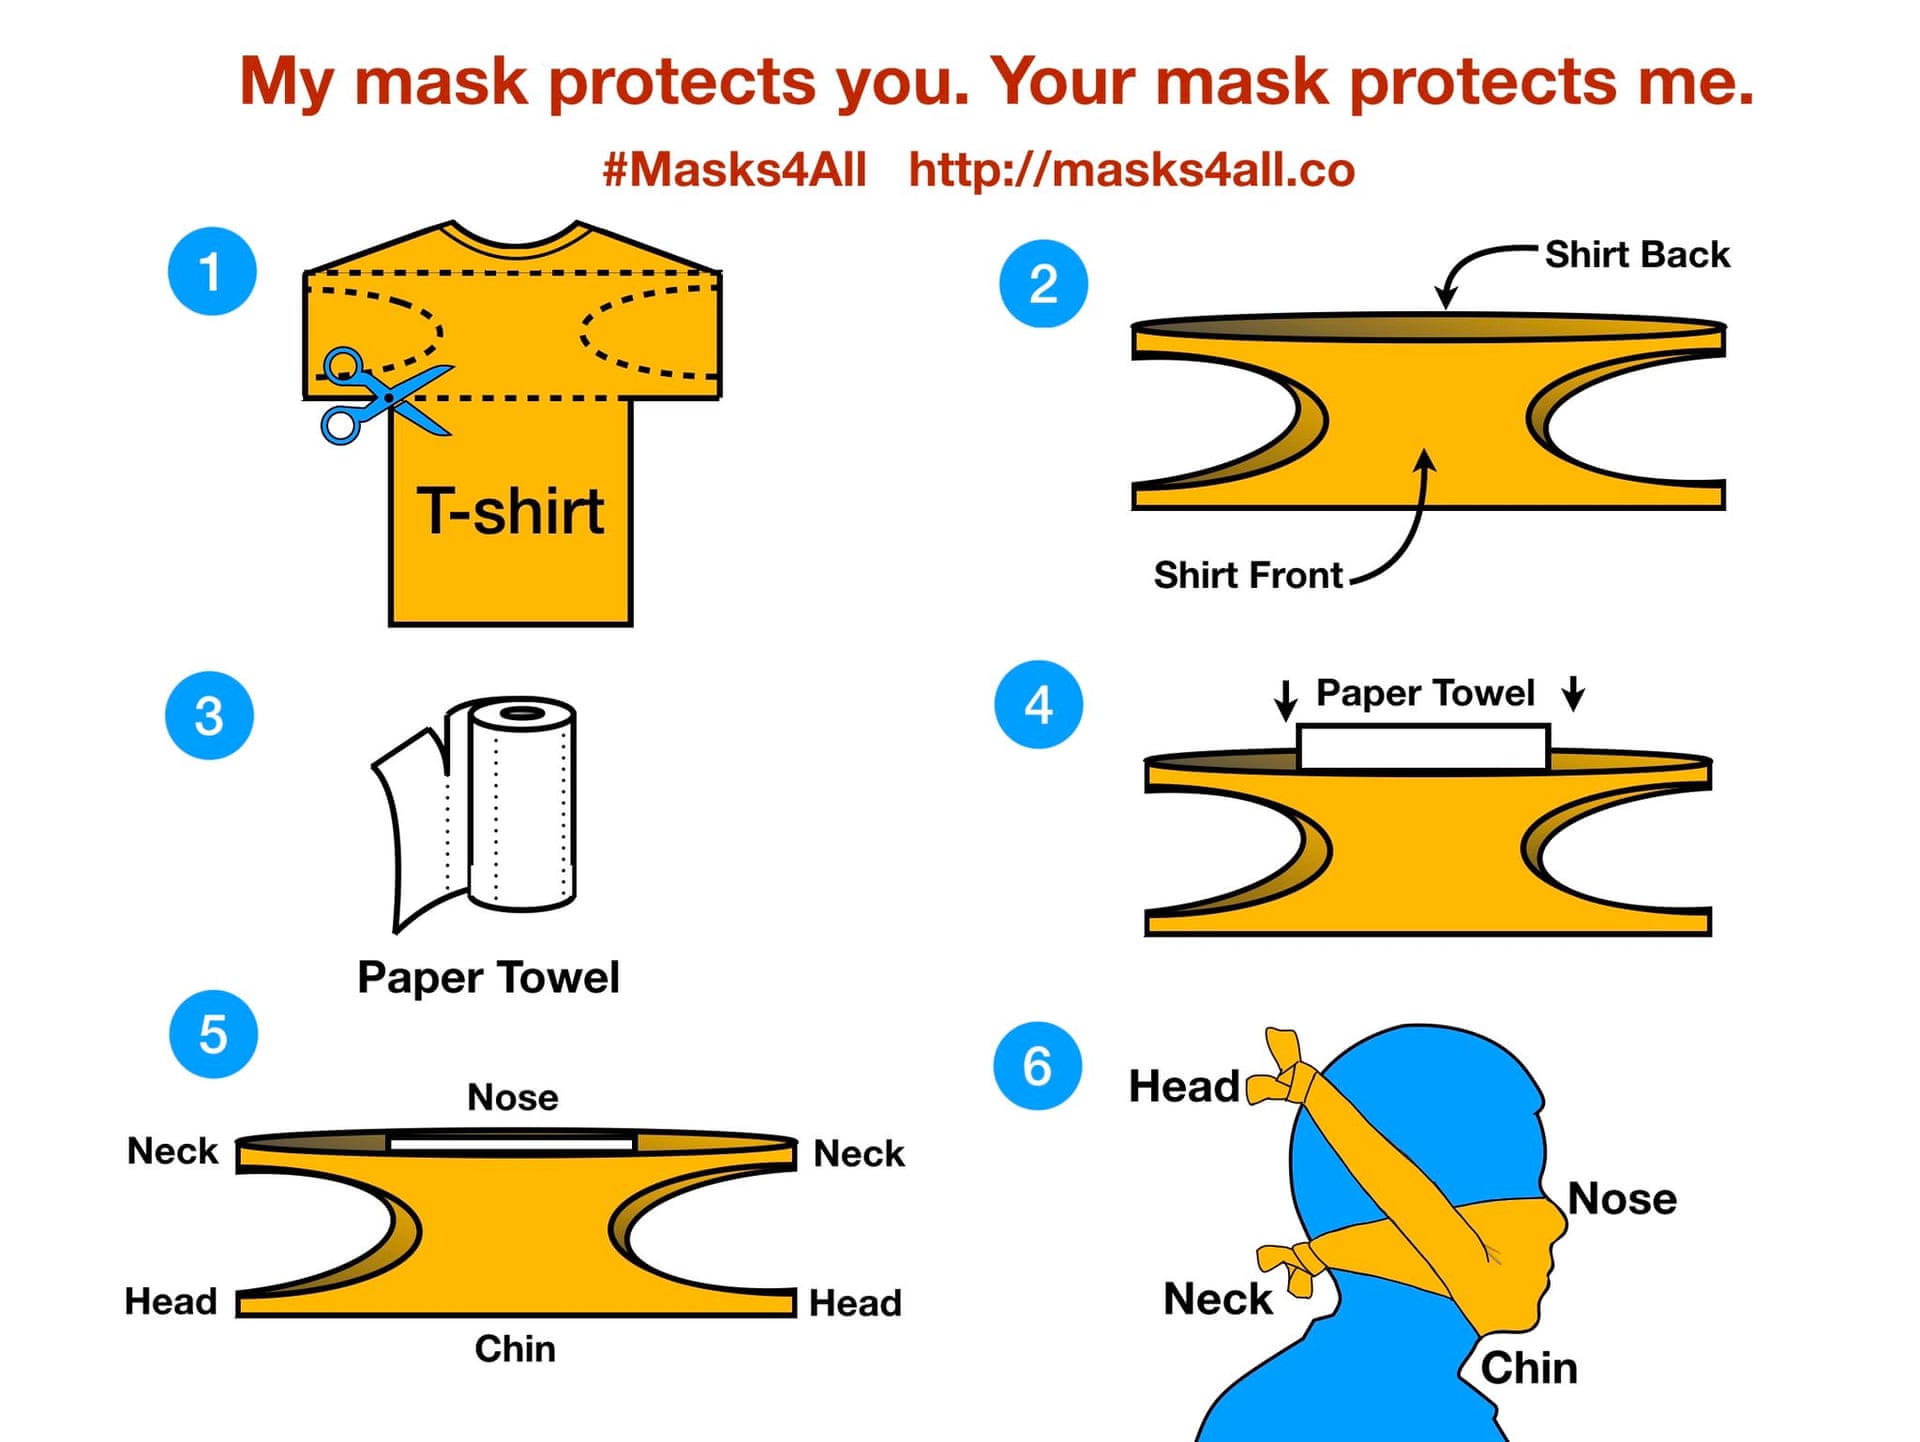
Others have generated their own versions on how to make your own face mask like Jeremy Howard, co-founder of Masks 4 All. He explained via YouTube alternative options in how to create your own face mask using similar methods. His steps below also provide an example of how to transform one from a t-shirt!
What new face mask will you be flaunting at your next show? Share with us in our comments your creative rave gear made during this quarantine!
Connect with EDM Identity on Social Media:
Facebook | Twitter | Instagram | SoundCloud | Mixcloud | YouTube


