If you have been wanting to pick up a camera and start honing your skills as a photographer there is no better time than now.
Photography is an enriching hobby and profession. A single photo can express what words fail to describe and convey volumes of emotion. There is something awe-inspiring about a good photo and if you are considering getting a camera to start your journey as a photographer, now is a perfect time.
But what if you want to become a photographer and don’t know where to begin? We’re here to help! While photography might be daunting at first, it can be quick to pick up. We want to encourage and help you get a comfortable start on your photo journey so after reading this article you’ll be on your way to capturing some great moments in no time at all.
Related: Looking for some inspiration? Check out our post highlighting some amazing festival photographers who have been killing the game!
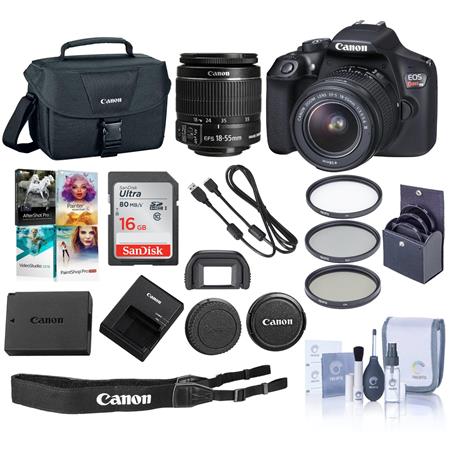
Firsts things first, you definitely need a camera.
You can get a basic DSLR kit at Costco or Amazon that comes with everything you need to start taking photos right away. If you get one from a friend, retailer, or app, you’ll want to make sure it uses detachable lenses. Do some research, see what best fits your needs, and ask a trusted friend’s opinion. You also might also want to add a 50mm f/1.8 prime lens to your kit. It’s an affordable and versatile lens that has great background blur for portraits and thrives in lowlight environments.
Once you get your camera it’s time to learn the interface and practice shooting in manual mode.
Most DSLRs have priority modes, but shooting in manual will give you the most creative freedom when setting up your shot. The three settings in manual mode that affect your photo are aperture, shutter speed, and ISO. Having an understanding of each setting and how they affect one another is crucial to snapping the best photos. Let’s start with aperture.
Aperture
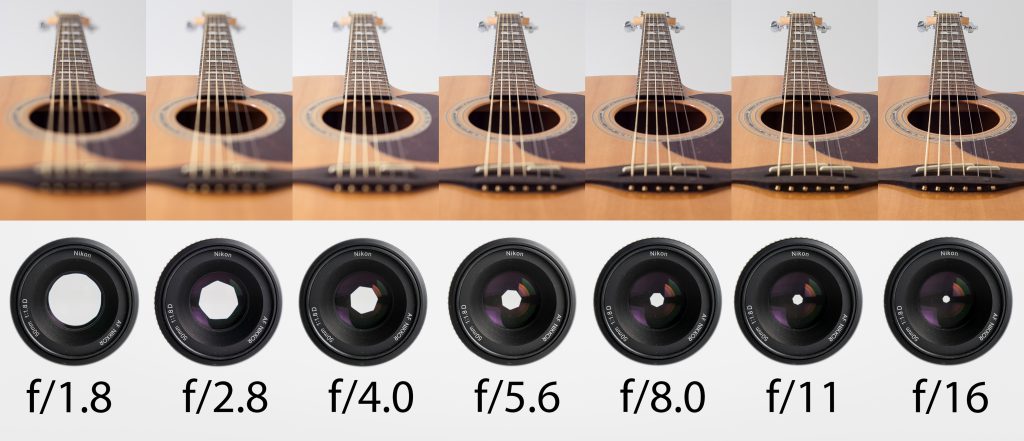
The function of the aperture is to control how much light enters through the lens. Raising or lowering the aperture affects the depth of focus of the image. With a larger aperture (f/22), the hole becomes smaller, and less light enters through the lens. This results in more of the scene in focus. Shooting at a high aperture is especially useful for landscape photos and astrophotography.
With a lower aperture (f/2), the hole is larger and more light enters the lens, thus decreasing the depth of field. This results in a bokeh or blurry background behind the subject. A low aperture is great for portraiture or lowlight environments, making prime lenses great tools.
Shutter Speed
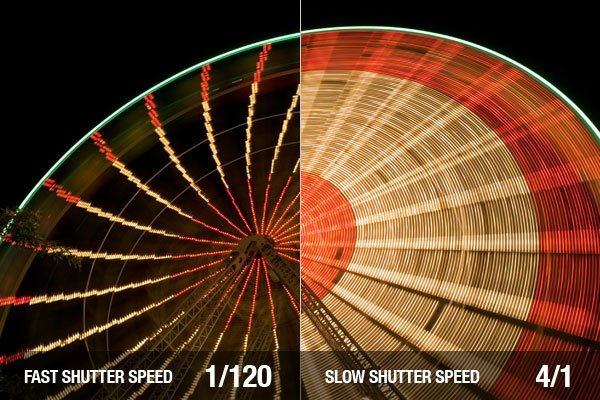
Shutter speed, denoted as a fraction, refers to how quickly the shutter opens and closes and controls how much light reaches the camera sensor. It affects your photo in two ways: motion blur and image brightness. Adjusting the shutter speed allows you to freeze an athlete in motion or get vibey light trails from nighttime city traffic. A fast shutter speed like 1/250 (of a second) will open and close the shutter fast enough to freeze anything in motion.
A slow shutter of 1/30 will keep the shutter open longer, allowing more light to reach the sensor. These are the shutter speeds that give you silky waterfalls, light trails, and starry skies. It’s important for a photographer to use a tripod when shooting photos with long exposures so there is no shake in the final image. When it comes to image brightness, opening the shutter or using a slower shutter speed will make your photo brighter. There is definitely a sweet spot when it comes to exposing your image properly for the desired look.
ISO
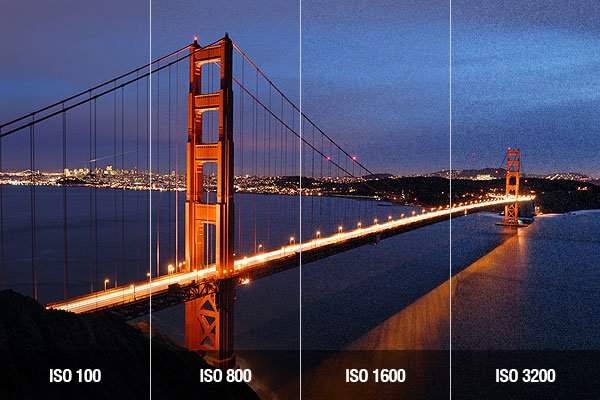
ISO is your camera sensor’s sensitivity to light coming in through the lens. A low ISO would be a value less than 500 and a high ISO would be a value greater than 6,000. ISO is useful when you want to make your image brighter, but cannot adjust the aperture or shutter speed (i.e. because you don’t want any motion blur). The drawback of increasing ISO is the photo will have more noise and graininess.
The good news is most editing programs have ways to reduce noise in post-processing, but you don’t always want to rely on that. It’s important to find the sweet spot for all manual settings. This will ensure you your photo comes out the way you envision.
Like anything, the more you practice the better you get.
Take your camera with you anywhere you go. Whether you’re going to the beach, on a hike, on a mountain top, in your backyard, to a sports game, concert, or birthday party, there are moments to be captured everywhere. Mess around with all the different settings. Get creative with your shots and experiment with different techniques. Look up YouTube videos and utilize Google when you have specific questions. All you need is a camera and the rest is up to the wizard. Time to start honing your new craft and become the photographer you always dreamed to be!
Connect with EDM Identity on Social Media:
Facebook | Twitter | Instagram | SoundCloud | Mixcloud | YouTube


